There are many beautiful pictures on the internet. But using one without permission can get you in trouble for serious copyright violations. This could put you at risk of legal action and financial penalties. Check the copyright status of any picture you want to use on a blog, website, or social media. To begin, find out where the picture came from. If it doesn’t say that it’s free to use, get permission from the creator or rights holder. Some images might have a Creative Commons license. You still have to give credit to the original author and follow some rules.
Are All Images on the Internet Copyrighted?
Are all images copyrighted? Almost all photos are protected by copyright law as soon as they are created. This is true whether they are published online or not. The short answer is yes, the image is copyrighted. This is true unless it is marked as public domain or licensed for free use (which is rare).
The real challenge isn’t determining whether it’s copyrighted but rather identifying the copyright owner. To use the image legally, you must determine who owns the rights. If there is no clear license, contact them for permission. Don’t worry—you’re in the right place to know exactly how to do that safely and correctly.
What Does It Mean When an Image Is Copyrighted?
When the law protects an image, the creator holds the legal right to use, distribute, and reproduce it. The majority of nations have automatic copyright. Images receive protection from the moment they are generated, even if they are not registered.
That means:
- The majority of online images hold copyright.
- You must not use them without authorization or a license.
- Even without a watermark or copyright sign, it remains safeguarded.
How to Check If an Image Is Copyrighted— 5 Easy Steps
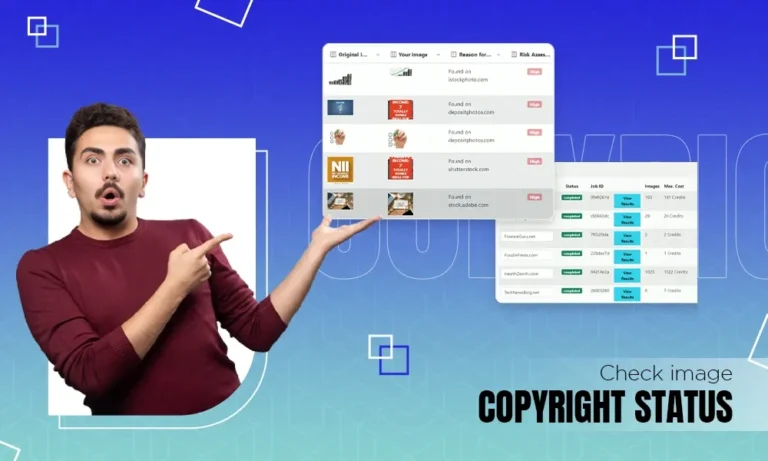
You can check if an image is copyrighted in several ways. One common method is to do a reverse image search.
You can use tools like Google Images or Bing Visual Search for this. This can help trace the image back to its source or website. However, reverse searching doesn’t always guarantee results, especially if the image has been widely shared or altered.
That’s why we’ve created a clear, step-by-step guide to help you identify whether a photo is protected by copyright. Follow these 5 essential steps to stay safe and compliant:
1. Do a Reverse Image Search (Google or TinEye)
Here we have discussed the use of Google & TinEye reverse image search.
If you can’t find the copyright owner using regular methods, try Google Reverse Image Search. It can help you find the source of a photo. Here are the easy steps to use Google to find the image ownership.
Steps to Use Google Images:
- Go to Google Images
- Click on the camera icon in the search bar
- Upload the image or paste its URL
- Check out the image’s appearances on other websites by browsing the search results.
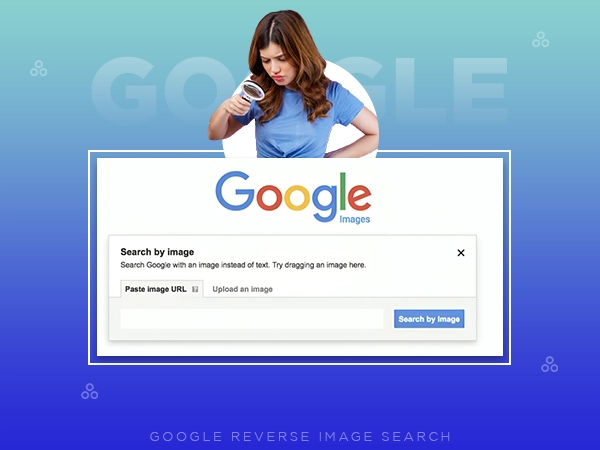
This method often shows you the original website where the picture was taken. This helps you find out who owns the rights to the image or if it is on a stock photo platform.
TinEye
TinEye is the most trustworthy tool for performing a reverse image search. It helps you find the places on the internet where an image shows up.
The TinEye tool helps to track the original source of an image. It can also find versions that have been changed. It also indicates when the picture was first published. Therefore, TinEye is perfect for checking the status of copyrights.
Steps to Use TinEye:
- Go to TinEye.com
- Paste the image URL into the search bar or upload it.
- Click the search button and look at the results.
- TinEye will show you a list of pages where the image was found, sorted by date or by relevance.
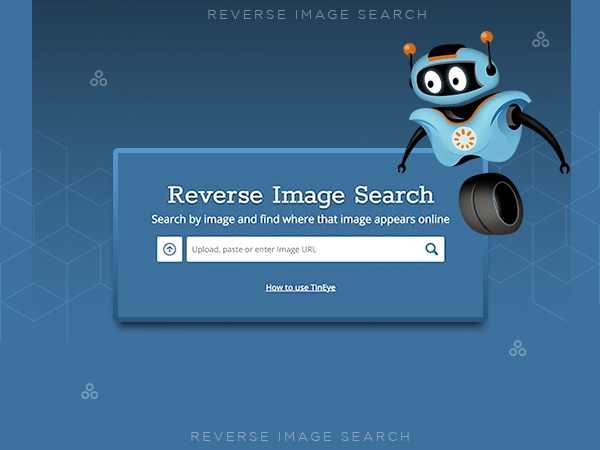
TinEye does not offer the option to track image usage in real time, unlike some paid tools. However, TinEye has a great free feature for quickly checking who owns an image. You can also find higher-resolution versions. Additionally, you can check if an image has been altered.
Pro Tip: These tools can help you determine who created the image or where it originated.
2. Check the Image Metadata (EXIF Data)
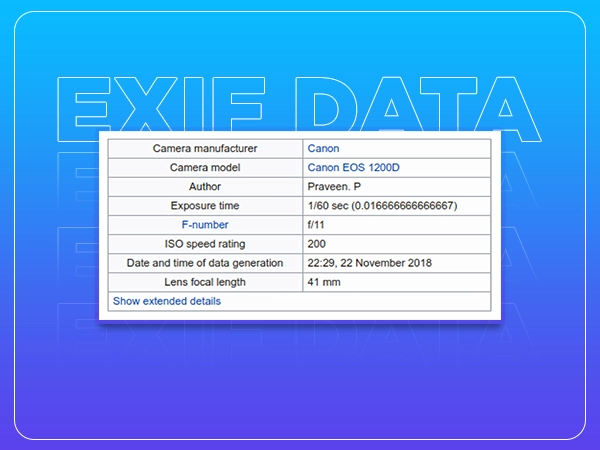
You might have heard the term “EXIF data,” which stands for “Exchangeable Image File Format.” It’s a type of metadata embedded in image files. It has helpful details, such as the camera model and the date the picture was taken. Sometimes, it also shows the copyright ownership information.
How to See EXIF Data:
- Download the picture to your computer
- On Windows, right-click the file and choose “Properties.” On macOS, choose “Get Info.”
- To view the available metadata, go to the Details or EXIF tab.
Images often contain metadata, including:
- Author/photographer name
- Copyright info
- Creation date
You can use tools like
- Get-Metadata.com
- Photoshop (File > File Info)
This information can sometimes show the photographer’s name, the copyright holder, or the software used to edit the picture. This can give you clues about where it came from and its licensing status.
EXIF data can be useful, but remember that it’s not always available. Some platforms remove metadata to reduce file size or protect user privacy.
👉 Pro Tip: Always check the EXIF data to verify whether the image is copyrighted or not. especially if you want to utilize it for public or business purposes.
3. Look for Image Credits or Contact Information

If you find an image online that you want to use, take a second to look for an image credit or attribution. Many websites include the photographer’s name, the copyright holder, or the source in a caption or below the picture. You might also see an email address, a link to the creator’s profile, or a URL that takes you to the creator’s website.
If you can find the contact information, it’s a good idea to get in touch with the image’s owner directly. You can ask for permission, negotiate usage terms, or buy a license to use the image legally. This method helps you avoid copyright issues. It also ensures that creators receive the credit and payment they deserve for their work. You can’t remove the watermark from an image by image editing software as it is illegal.
👉 Pro Tip: Always keep a copy of the agreement or license for your files, especially if you plan to use the image for commercial purposes.
If you saw the picture on a blog or website, scroll down to find:
- Information about usage rights or licenses info
- Creative Commons licenses, like CC BY and CC0
- “All rights reserved” tags
4. Use the U.S. Copyright Office Database to Check Image Rights
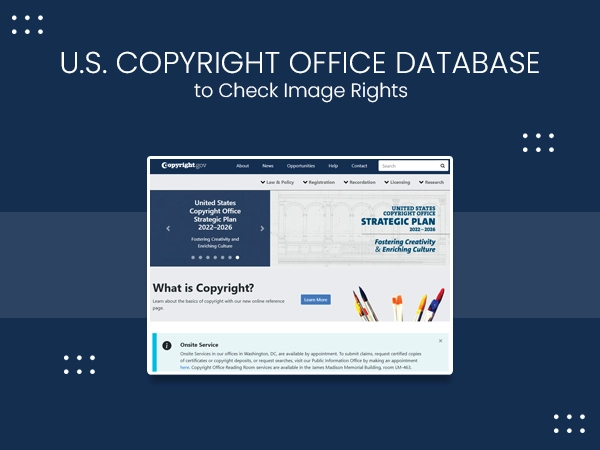
You can use the U.S. Copyright Office Public Catalog to check whether the photo is registered or not. You need to know the photographer’s name or the title of the image. To view if the image is officially registered or not.
You can check image rights by following the steps.
- Visit copyright.gov
- Search by name, title, or keyword to check if the image is listed in the database or not.
But it’s important to know that an image doesn’t have to be registered for copyright to protect it. In U.S. law, copyright is automatically granted when an image is created, even if the image is never submitted for formal registration.
If you don’t find anything listed in the database when you search, that doesn’t mean the image is free to use. It might still be protected by copyright and have licensing restrictions.
5. If you’re not sure, don’t use the image
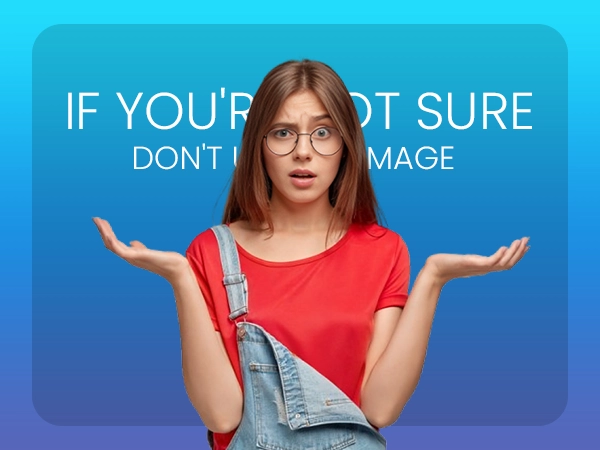
If you are unsure if an image is copyrighted, it is best not to use it. This is true even if you have followed all the steps. Copyright owners often actively look for people who are using their content without permission on the internet. If you use an image without permission, you can get legal action, fines, or takedown notices.
Instead of taking the risk, look into the many trustworthy image sources that are available online. They range from free stock photo sites to premium image libraries. There are many options to get high-quality, license-compliant images for any need and budget.
There is no reason to take a chance with copyright. There are lots of legal options available. Thus, it’s always better to be safe than sorry when it comes to copyright infringement.
Best Practices for Safe Image Use
Here are the best practices for safe image use.
| Tip | Why It Matters |
| Use royalty-free or public domain | Safe for most uses, especially business |
| Give credit to the photographer | Required by a lot of Creative Commons licenses |
| Keep track of your licenses | Keeps you safe in case of disagreements |
| Create your own pictures | 100% Complete control and originality |
| Be careful when using AI-generated images | Some models may not be able to be used because of copyright issues. |
Final Thought
Using protected images without permission can have serious legal, financial, or content removal consequences. Whether you’re an individual creator or a photo editing company, it’s important to read and follow the rules that each copyright holder sets for their images before you publish any visual content.
Just because an image is online doesn’t mean you can use it for free. If you don’t follow copyright rules, you could face expensive consequences and lose your credibility.