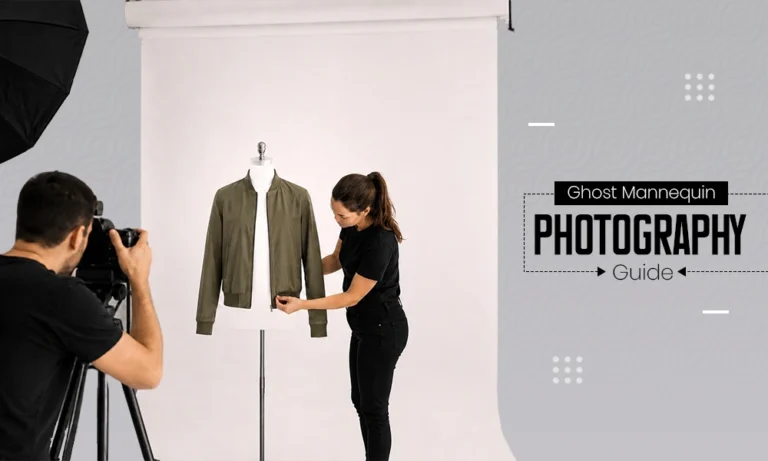
A ghost mannequin photo utilizes a creative, professional, and visually appealing way for fashion companies to photograph their products without a visible model. This allows garments to be structured and fitted in form while focusing only on the actual product itself.
The primary advantages of the ghost mannequin technique are that compared to either flat lay or live model photography. The ghost mannequin method provides consistent, scalable, and premium-looking imagery, all of which are important attributes for enhancing clarity and presentation in eCommerce channels, where both clarity and presentation can drive direct sales.
What is the Ghost Mannequin or Invisible Mannequin Effect?
The ghost mannequin photo technique, otherwise known as ‘invisible mannequin effect,’ uses a mannequin in the photo session and then ‘removes’ it during the edit.
Working with the technique:
- Photographing the clothing on a mannequin establishes how the garment is supposed to hold its shape
- To make the mannequin appear as though it isn’t there, additional images of the inner neck and/or back of the garment may also be captured.
Editing and assembling these images allows for the illusion of a three-dimensional “hollow” garment.
Advantages of the ghost mannequin technique:
- Provides a three-dimensional image without distractions
- Emphasizes the garment’s fit and structure
- More visually appealing than a flat lay.
Industries using this technique include:
- Fashion ecommerce: shirts, dresses, outerwear
- Sportswear manufacturers
- Kidswear catalogues.
Essential Equipment for a Professional Ghost Mannequin Shoot
The first step toward achieving sharp, clean ghost mannequin photographs is to ensure that you have a proper set-up. If you have poor choices for your equipment, it will be much harder to do your editing.
Cameras & Lenses:
- Using a DSLR or mirrorless camera is recommended.
- A 50mm or 85mm lens is ideal to minimize any distortions.
- If shooting in RAW format, it will allow for more flexibility during your editing process.
Lighting:
- Soft, Balanced Lighting is important.
- Softboxes give you diffused light.
- Continuous lighting is an easy option for beginners.
- Strobes give you the most control and are used with professional set-ups.
It is very important that you avoid having harsh shadows or having shadows that are uneven.
Mannequins:
- Full-body mannequins are used to shoot dresses and coats.
- Half-body mannequins are used to shoot tops.
- Adjustable mannequins allow you to shoot all different sizes of clothing.
Using a detachable neck on the mannequin can simplify the editing process due to easier access to the product.
Backdrops:
- It is preferred to use a white or light grey backdrop.
- This allows for simple editing, as well as allows for all of your products to be consistent.
Also Read: Best Wedding Photography Backdrops
How to Shoot Garments: Step-by-Step for Invisible Results
Execution of the shoot is more important than the tools you are using; small mistakes while shooting could make the edit very difficult.
Step 1: Dress the mannequin correctly
- Smooth out any wrinkles; use clips or pins at the back.
- Ensure the mannequin is symmetrical; ensure seams are aligned correctly.
Step 2: Capture exterior shots of all garments from
- The front (chest height level);
- Consistent framing;
Step 3: Capture interior shots of the garment
- Carefully remove the garment
- Shoot the inner neck, label, or back panel
- Create the invisible effect
Step 4: Capture extra detail
Take additional photographs of:
- Sleeves
- Collars
- Cuffs;
- Helps refine composite.
Step 5: Maintain consistency throughout all photographs
- Same camera angle
- Same lighting setup
- Same distance and zoom
Consistency is what helps to create a seamless edit.
Common Shooting Mistakes That Ruin Your Post-Production
Many novice photographers fail to realize that shooting mistakes can greatly impact their post-production work.
Common problems include:
- Wrinkled Fabric
- Unprofessional Appearance
- Difficult to Repair in the Editing Process
- Poor Studio Environment (Dust, Dirt, or Unwanted Reflections)
- Gives Garments Shape that is not Natural
- Destroys Symmetry
- Contrasting Light between Different Sets of Photos
- Can Produce Visible Editing Lines
Wrong Mannequin Size/Type:
- Too Tight -> Stretched Fabric
- Too Loose -> Lack of Support/Structure
- Too Many Camera Angles Change Image Merge
- Gives an Improbable End Product
If you can fix these mistakes before they are made, it will save you HOURS of editing time!
How Ghost Mannequin Editing Works in Post-Production
The editing process is where “magic” happens by merging several photographs together to create one seamless image.
Key steps:
1. Neck Joint
The inside neck of an item you will photograph together with the outside photo to create a seamless image.
Will give the appearance of a hollow neck as well as a more natural look.
2. Background Removal
Typically, you will change the background to pure white (#FFFFFF) to fit the guidelines of a marketplace.
3. Merging Images
You will merge both the inside and outside images by lining up the edges and adjusting the shadows and depth.
4. Final Touch-Ups
You will perform the following final touch-ups: color correction, crease removal, and symmetry adjustment.
This process requires both experience and precision, especially when working with more complicated garments such as jackets.
DIY vs. Outsourcing: Scaling Your Apparel Photo Editing
You have two main options: handling editing in-house or outsourcing it to specialists. Here’s a clear comparison:
| Factor | DIY Editing (In-House) | Outsourcing to Specialists |
| Control | Full control over edits | Less direct control |
| Cost | No outsourcing cost | Requires payment per image/project |
| Time Investment | High – editing is time-consuming | Low – faster turnaround |
| Skill Requirement | Requires strong Photoshop expertise | No in-house expertise needed |
| Scalability | Not ideal for large catalogs | Highly scalable |
| Consistency | May vary depending on editor | Consistent, professional quality |
| Turnaround Speed | Slower, depends on internal bandwidth | Faster with dedicated teams |
Conclusion
Ghost mannequin photographic style is a highly-effective method for presenting clothing items in an e-commerce manner. The combination of ghost mannequin and model-less photography gives customers a complete view of the clothing, without distraction from other items. Achieving the best results requires effort and skill in each step of the creation process—careful shoots, consistent lighting, and accurate editing.
To increase your product catalog without reducing quality, try improving your shooting workflow or using the skills of professionals like Visuals Clipping who do ghost mannequin photographic editing. Your products should look beautiful not only to attract customers, but also to increase the chance that they purchase something from you, while also presenting your brand well.
Frequently Asked Questions (FAQs)
Q1: What is ghost mannequin photography?
Ans: Ghost mannequin photography uses mannequins during shooting, then removes them in editing to create a hollow, realistic 3D garment appearance.
Q2: Do I need a special mannequin?
Ans: No, but detachable or adjustable mannequins make shooting easier and improve final results by simplifying editing and maintaining better garment structure.
Q3. Can beginners do ghost mannequin photography?
Ans: Yes, beginners can learn it, but mastering lighting, garment styling, and post-production editing requires consistent practice and attention to detail.
Q4. Why shoot interior images separately?
Ans: Interior shots capture hidden areas like the neck or lining, which are essential for creating a realistic invisible mannequin effect during editing.
Q5. Is a ghost mannequin better than a flat lay?
Ans: Yes, it shows garment shape, structure, and fit more effectively, making it more suitable for ecommerce compared to flat lay photography.