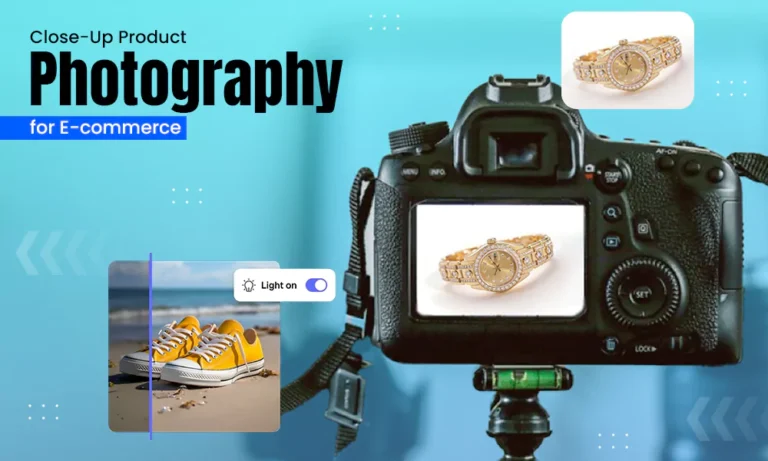
One picture can tell an entire story. However, by taking a close-up photo, you reveal some things that might otherwise go unseen, such as the veins on a flower or the texture of a handmade item. Using this technique allows both photographers and brands to showcase their work in its finest form.
Whether you’re a novice learning about your camera or a seller looking to improve your eCommerce product photos, being able to create close-up photos is an extremely effective way to create visual stories. In this article, we’ll look at various techniques, camera settings, lighting tips, and editing tips for close-up photography to help you create amazing images for your brand product.
What Is Close-Up Photography and How Is It Different From Macro?
Close-up photography is taking photos of an object at a short distance to show off the details, textures, and unique characteristics of the object. The types of objects are typically products, flowers, food, and portraits; the purpose is to accentuate specific elements in the subject. While taking a close-up photo magnifies the subject, the main distinction is that macro product photography editing takes a picture of a subject that is exactly life-size (1:1 magnification) or larger than life using a special macro lens. Therefore, all macro photos are close-up photos, but not every close-up photo is considered to be macro photography.
Why Close-Up Product Shots Are Essential for E-commerce Conversion
When shopping digitally, close-ups are very important to the customer for making a buying decision that totally depends on product photos. Close-up images give the buyer the ability to view product details, such as materials, fabrics, stitching, finishes, and craftsmanship, which will help increase the buyer’s trust in the goods they purchase. Product details in high-quality close-up images will add trust, decrease doubt, and provide an accurate digital shopping experience to the customer. Professional photo editing of the close-up images will help increase customer interest in the product, reducing the number of items returned and increasing the conversion rate by providing the customer with the visual data they need to make their purchase.
Also Read: 360° Product Photography Basics for Ecommerce Success
Essential Camera Equipment for Professional Close-Up Photography
Having the correct camera equipment will help produce sharp, clear, and detailed, professional-quality close-up product photos. The essential aspect of taking close-up shots is to have a macro, or close-up, lens for your digital camera, and a good quality, sturdy tripod that will hold the camera still when you are taking close-up images.
Capture sharp, clear, and detailed, professional-quality images by having the right camera accessories for taking close-up product photos, which all photographers should consider when taking close-ups:
A Dedicated Macro Lens
The macro lens has been made to take pictures of small objects at a close distance and be perfectly sharp. A Macro lens will allow you to capture these types of life-like detail, such as texture, engraving, and intricate details that only the human eye can see.
DSLR or Mirrorless Camera System
You can photograph in high resolution with greater control over focus, exposure, and image quality with either type of camera. You’ll also benefit from interchangeable lenses, as they give you the ability to change your focal lengths as needed.
A Tripod
It is necessary if you wish to maintain a stable camera when taking a photograph. Without a tripod, you will create a blurry image due to the slightest bit of movement. A tripod can also help you keep your camera framed the same way for multiple product shots.
Softboxes and LED Lighting
It provides the most even light that can be used for product photography. Using a softbox will create diffused lighting, which eliminates unwanted shadows and reflections, thus allowing the product to be visible in all its detail. Using LED lighting, the lights will be positioned close to the product while creating even light on all sides of the product.
Shutter Release or Camera Timer
Remote shutter releases will help reduce camera shake. You will be able to take pictures remotely and not need to physically hold the camera or press down the shutter button to take a photograph.
Also Read: Best Camera for Product Photography
The Technical Challenge in Close-Up Photography: Field Depth
The major technical issue with close-up photography/macro photography is shallow Depth of Field. As the camera approaches the subject, less area will be in sharp focus. For example, when using a 1:1 Magnification with a f-stop of 2.8, the Depth of Field will typically be only a fraction of a mm; therefore, only a small amount of the product detail will be photographed.
Using a Small Aperture (f/11 – f/16)
Using the smallest aperture possible (i.e., f/11 – f/16) on your lens is the best way to have a large depth of field for your photograph. This allows you to keep as much of your subject in focus in one exposure. This is a great method for most close-up photos of your subject. However, there are some disadvantages to using the smallest apertures on your lens.
Focus Stacking (The Professional Standard)
The best way to achieve maximum sharpness throughout your entire subject is through focus stacking. Focus stacking is the act of shooting 10-30 different images of the same subject at slightly different distances to achieve maximum sharpness from the front of your subject to the back of your subject. In Adobe Photoshop, these images can be combined using Edit → Auto-Blend Layers → Stack Images to create one photograph with stunning detail throughout.
Focus stacking is commonly viewed to be the best solution for taking close-up products, especially when you want every detail to be sharp and clean in items such as jewelry, watches, coins, electronics, and engraved items.
Best Lighting Techniques for Close-Up Product Photography
For Close-Up Photography, lighting is important to capture the fine details, textures, and colors of the product that can be seen when shooting close with a camera, and also for eliminating any distracting shadows or reflections in an image. Here are the four lighting techniques to consider for shooting product close-up images.
- Illumination with Ring-flashes, Macro Ring Lights: Ring-flash and macro ring lights are installed on the front of your camera lens and provide an even source of light without shadows when working at a close distance. They are perfect for photographing small items such as jewelry, coins, flowers, and cosmetics, where having consistent light is required to show detail without harsh shadows.
- Twin Flash System: With twin flash systems, you have two adjustable flash heads that provide two distinct sources of light for your subject. Each can be positioned in various directions to enable the user to control both the angle and intensity of the resulting light independently. The use of twin flash systems provides more natural-looking shadows and enhances the subject’s texture, making it highly desirable for jewelry or engraved items that have complicated surfaces.
- Small LED Panel with Diffuser: A compressed LED panel having a diffusing lens provides a soft and continuous source of light, which helps evaluate the exposure and shadows created while capturing images. This is beneficial for product photography because the LED panel produces excellent color accuracy and minimal glare when placed at various positions in relation to the subject.
- Reflectors: Reflectors are the perfect tool for reflecting light onto your subject and filling unwanted dark spots. When placed close to the product, the reflector will increase the amount of light and will allow for the revealing of hidden details while also providing a well-balanced, professionally photographed image without having to add additional light sources. The use of small silver, white or gold reflectors is highly recommended for this purpose.
8 Close-Up Photography Techniques for Sharper Images
Here are the most useful close-up product photo tips
1. Use Focus Stacking for Maximum Sharpness
For total sharpness in every shot, focus stacking is the way to go! To accomplish this, shoot multiple pictures with slight variations in the focus for each one and then merge them together into a single image using image-editing software such as Adobe Photoshop.
2. Utilize Live View and Manual Focus for Precision
While using the autofocus feature may not allow you to succeed in accurately focusing on an object located at macro magnification, changing over to the Live View feature, combined with manual focusing, will allow you to zoom in on the live view screen and make precise adjustments to your focal point to capture extreme detail in the final image.
3. Prevent Camera Shake with a Remote Shutter Release
Even using the camera’s shutter button can potentially result in a small vibration to the camera body when a close-up shot is taken, which can negatively affect the sharpness of the image. To achieve clear close-up images while minimizing vibration, use either a remote shutter release, a wireless trigger, or the self-timer built into most cameras.
4. Utilize Your Camera’s Mirror-Lock-Up Feature
When taking photos with digital single-lens reflex (DSLR) cameras, the mirror movement can also cause vibrations that can negatively affect the quality of the image, especially in macro photography. By utilizing the mirror lock feature, you will help minimize vibrations created by the mirror movement during the time that you press the shutter and take the exposure, and have sharper images as a direct result.
5. Use Side Lighting to Highlight Texture and Fine Details
The macro lens product photography technique relies on side light, which allows you to create highlight and shadow areas on the surface of the product. This is a great way to showcase the texture of fabric, wood, leather, engraving, and other detailed characteristics of your products.
6. Use a Black Background for Dramatic Product Close-Ups
Using a black background to photograph a product can really make a product stand out. You can create a very high-contrast photograph of the item while simultaneously eliminating all possible visual distractions for the viewer. Using a black background works particularly well for products that are luxury items, such as watches, jewelry, cosmetics, and high-end electronics.
7. Use Water and Macro Details to Add Lifestyle to Your Product
Utilizing products that have water droplets on them or providing extreme details in close-up photography will help your product images look more engaging and visually appealing. This technique is frequently used with beauty products, beverages, plants, and fresh products in order to capture the essence of freshness and realism.
8. Shoot With a Computer Connection for Instant Image Review
Shooting tethered (connecting your camera to a computer using a cord) allows you to view images in real-time as they are captured; thus, you can evaluate the focus, lighting, composition, and finer details of the photograph without having to go back to your computer after the shoot is completed, making it easier and quicker for professional photographers.
Best Close-Up Photography Techniques for Different Product Types
Every product needs a different photography technique to capture the details of the object and sharpen the images. For example
- Jewelry: When taking close-up photographs of jewelry, often referred to as ‘macro photography’, you can highlight elements such as brilliance, cut, and craftsmanship for various types of jewelry (e.g., rings, necklaces, earrings, and bracelets) by using a macro lens with soft diffused lighting, along with focus stacking to bring out the qualities of gemstones (including engravings).For professional results, pair close-up shooting with expert jewelry retouching.
- Watches: A luxury watch close-up shot should include detailed close-ups of the dials, polished cases, engravings, etc. Use side lighting and careful control of any reflections to highlight both the texture and mechanical elements of the watch, while also using focus stacking to keep everything within the watch sharp.
- Cosmetics & Skin Care Products: The close-ups taken of cosmetic and skin care products should reflect the quality of both the packaging (visual and physical), as well as the texture and finish of the product itself. Using soft, even lighting in combination with clean backgrounds will create high-quality imagery, instilling a level of confidence in your customer.
- Electronics & Gadgets: Close-up photography for electronic devices will capture key features (e.g., buttons, ports, displays, and overall premium finish). Sharp focus and true-to-life colors, along with controlled reflection, will lead to a polished and professional image of the device.
- Food & Beverages: Through the use of detailed close-up images of food, you can create a visually appealing representation of the food that appears fresh and flavorful. Use natural light or diffused lighting to enhance the texture of the food with the addition of garnishes, steam, or drops of water to enhance depth and interest in the photograph.
- Fashion & Apparel: Detail shots – close-ups of fabrics, stitching, buttons, embroidery, and zippers – are a great way for online shoppers to evaluate the material, craftsmanship, and finish of a garment before purchasing.
- Footwear: Detail shots of the grain, stitching, soles, branding, and distinctive design elements of the shoe can illustrate quality. Use side lighting to help highlight the texture, and shoot from multiple angles to provide the customer with a complete view of how the shoe is constructed.
- Furniture & Home Décor: Close-up photographs will show the wood grain of a piece of furniture, the upholstery of a piece of furniture, the finishes on a piece of furniture, and the decorative features of a piece of furniture that define high-quality furnishings. Consistent lighting and accurate color reproduction will enable your customers to appreciate the materials and craftsmanship that went into creating the product.
- Handcrafted Products: Handcrafted products often exhibit unique textures, carvings, weaving, or painted details that warrant using close-up photographs. Close-up photographs will effectively display the craftsmanship of the artisan and allow potential buyers to understand the authenticity and value of each piece.
- Glassware & Ceramics: When photographing glass and ceramic products, it is crucial to use proper lighting to help avoid glare and to display the shape, texture, and finish of the product accurately. Effective use of diffused lighting, creating a clean background, and controlling reflections will help create an elegant photograph.
Post-Production: How to Edit Close-Up Photos for Professional Results
To begin, even with fantastic close-up photographs, they can be improved through post-processing.
- Sharpening Techniques for Macro Photos: Sharpen the subject primarily, and stay away from over-sharpening because it will give the subject an unnatural-looking appearance.
- Removing Dust Particles: Use healing/cloning tools to remove minor dust particles from your photograph so that your item looks clean and premium enough to be sold.
- Dust Spot Removal: Use the Spot Healing Brush or Clone Stamp tool to eliminate any noticeable dark spots for the final look of the photograph.
- Color precision: eCommerce requires precision and color correction when photographing products due to customer demand for the delivered product to match the online image.
Also Read: How to Edit Ecommerce Product Photos Quickly
Final Thoughts
Patience, precision, and attention to detail are essential to mastering this art form (close up photography). If you know how to use the correct equipment, understand how to light your subject correctly, and think through your composition carefully, you can produce stunning close-up photographs that demonstrate textures and characteristics of your subjects that are often lost in standard photography. Taking advantage of practical close-up product photography tips and investing in detailed shot editing for e-commerce sites will make online shoppers feel more confident in purchasing the products.
Frequently Asked Questions (FAQs)
Q1: What is close-up photography?
Ans: Close-up photography is when you take photographs at a very close range, specifically to highlight all of the details and characteristics of the item; it is predominantly an element of product photography, as capturing items used in their entirety will not allow you to show how the item actually looks.
Q2: How does close-up photography differ from macro photography?
Ans: Macro photography is usually referred to as a “life-sized” photo (1 : 1) of the subject, but it is important to realize that there are numerous close-up photography shots that illustrate the characteristics of an object without taking a full “life-sized” photo. Most times there are many characteristics that cannot be identified by the naked eye with macro photography but can be identified with close up photography.
Q3: Do I need a macro lens to obtain close-up images of products?
Ans: Not necessarily. A typical lens can create good close-up images; however, macro lenses provide higher levels of sharpness, closer focusing distances and enhanced detail reproduction, which is why they are the preferred lens for professional product photographers.
Q4: What are the best settings to use for close-up photography?
Ans: For close-up images, it is best to use a small aperture (typically f/11 – f/16), a low ISO (100-200), manually focus and use a tripod. Using these settings will increase the quality of your image and eliminate any camera shake, thereby increasing the detail of your close-up photographs.
Q5: Why is the depth of field (DOF) so short on macro photographs?
Ans: As you increase the magnification of the original object, the DOF becomes very short, and hence, only a small part of the original object will be in focus. You can overcome this short DOF problem by using a smaller aperture and/or the technique of focus stacking.