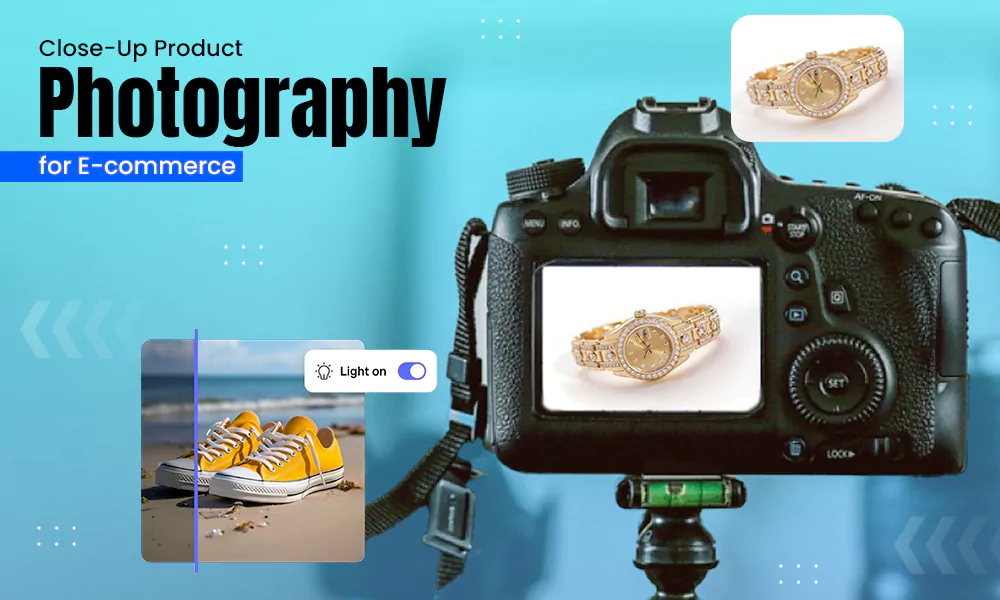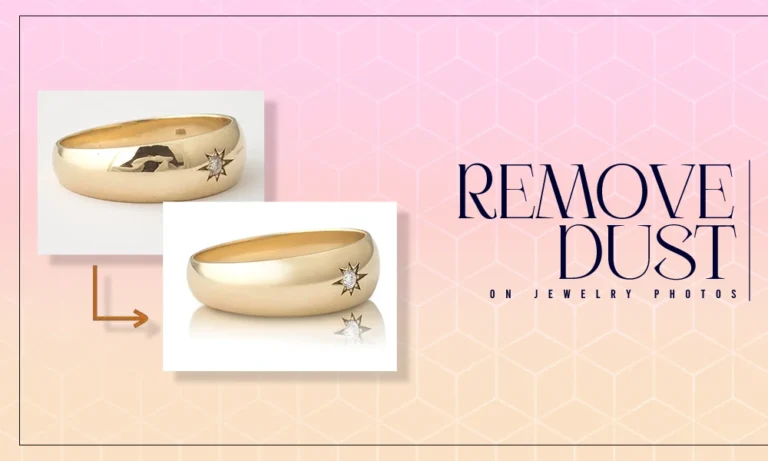
No matter how top-notch the equipment you have in your studio, you can’t have any control over environmental factors. Dust in the air, minute scratches on the object, all of this hampers the visual presentation of the products.
Especially with the case of jewelry product images, where each and every facet should look flawless. These cleanups can easily be performed to make them look more luxurious and shiny.
Here is the walkthrough guide on various methods you could use to clean dust and scratches on jewelry images.
Why Clean Jewelry Images Matter for Professional Retouching
When it comes to jewelry photography, even the smallest dust particles or tiny scratches may distract from the beauty of a premium item. These mistakes may seem minor, but when viewed via a camera, they become noticeable distractions that reduce the image’s quality and its visual attractiveness.
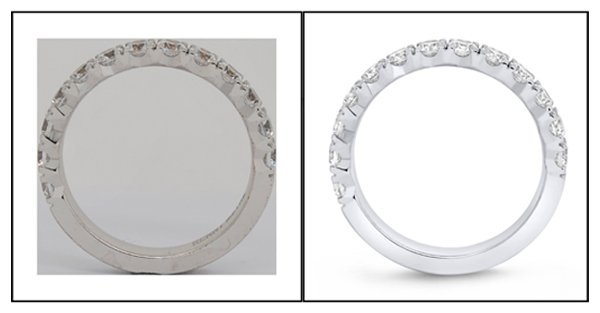
Jewelry Items, particularly diamonds and gemstones, are luxury items; Hence, every picture needs to be flawless. A single particle on a pendant or ring might draw attention away from the piece’s worth and craftsmanship. That is why dust and scratch removal in jewelry photo retouching is not just important; it is essential for high-quality jewelry images.
Fortunately, Adobe Photoshop provides powerful tools for carefully removing these defects and improving image quality. You can display your jewelry in the most immaculate, polished manner possible with the correct retouching techniques, which will increase conversions and give buyers more trust.
Top Photoshop Tools for Flawless Jewelry Photo Retouching
To properly repair jewelry photos, you must become proficient with the following Photoshop tools. They are used in different ways depending on the flaws involved, such as dust, scratches, and blemishes.
Healing Brush Tool
The Healing Brush is ideal for removing small dust particles and blending flaws into the surrounding texture to create a surface with a natural appearance.
Clone Stamp Tool
The Clone Stamp tool allows you to recreate clean portions and paste them exactly where you want, which makes it perfect for correcting larger problems like noticeable scratches or tarnished areas.
Patch Tool
The patch tool is particularly used for repairing complicated textures such as scratched metal or chain links, due to the possibility of making area-specific corrections without destroying the natural texture.
Spot Healing Brush Tool
Fast and effective, it can erase the small spots, blemishes, and dust in a few seconds with little effort. So, this tool is the preferred choice for quick touch-ups.
Strategic use of these tools will give your jewelry photos a polished, high-quality look that is ideal for catalogs, e-commerce listings, and luxury brand advertising. For more perfect outcomes, outsource jewelry photo retouching services that will help in making your product images shine.
How to Remove Dust and Scratches in Photoshop Step by Step

High-quality and clean jewelry images play an important role in showcasing high-end jewelry online. Even fine scratches or small dust particles may distract from the appearance of professionalism and luxury.
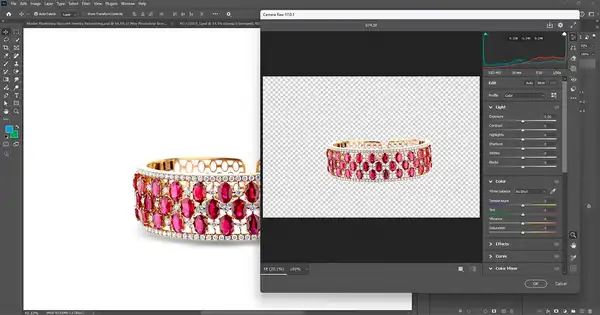
Fortunately, Adobe Photoshop has a collection of powerful tools that help in cleaning and improving the quality of your product photos.
The following is a detailed step-by-step guide for performing jewelry photo retouching with a focus on dust and scratch removal.
Step 1: Open Your Jewelry Image in Photoshop
Start by opening the jewelry image you wish to repair in Photoshop. It is best to work with high-resolution photos because they offer greater editing freedom and detail.
- Create a Duplicate Layer: Use shortcut keys Ctrl + J (Windows) or Cmd + J (Mac) to duplicate the original layer. This allows you to revert changes if necessary and guarantees non-destructive editing.
- Zoom In For Highlight Precision: View the image more closely with the Zoom Tool (Z) at 200–300% magnification. This makes it easier for you to spot the smallest imperfections that can be missed at regular size.
Step 2: Dust Particle and Depth Scratch Detection
Take a close look at all reflecting surfaces, including gemstones, metal, and diamonds. These areas are most likely to show microabrasions or dust spots.
Pro Tip: Switch between various zoom settings and lighting curves to bring out flaws that are concealed in the highlights or shadows.
Step 3: Dust Removal With The Healing Brush Tool
The Healing Brush Tool is the perfect tool for dealing with small and isolated dust spots.
- Select the Healing Brush Tool (J) in the toolbar.
- Set the Content-Aware mode for intelligently mixing.
- With [ or ] keys, you adjust the brush size to match the dust spot.
- To fade the spot, simply left-click on the dust mark to join it with the overall feel.
- Apply again if necessary to improve blending.
Step 4: Eliminate Scratches Using The Clone Stamp Tool
The Clone Stamp tool provides greater control for deeper or linear scratches.
- Select the Clone Stamp tool (S).
- Hold Alt (Windows) or Option (Mac) and the dirty area source, the scratch.
- To reconstruct the surrounding pixels around the scratch, carefully brush along the scratch.
- Adjust the opacity and flow settings to achieve a finish with a realistic texture.
Step 5: Patch Tool with Sizes of Damaged Areas
The Patch Tool is very useful when managing wider scratches or irregular surface imperfections which are irregular.
- Click on the Patch Tool in the toolbar.
- A selection should be made around the damaged area.
- Copy the choice to a non-touched area of similar texture.
- Textures will be mixed by Photoshop.
- And in our optional methods, clean up the mix with the Healing Brush Tool.
Step 6: Final Clean Up And Image Improvement

Dust and scratches are already eliminated, now it is time to polish the image.
- Check the entire image again by panning and zooming in.
- Improve the details with the help of contrast, brightness, and sharpness.
- Make the realism better by softly increasing natural reflections or adding glow where required.
Step 7: Save Your Edited Jewelry Photo
Once satisfied with the photo retouching:
- Save as a PSD file format to save layers that can be used in later editing.
- Export as a JPEG or PNG file format for a listing on an e-commerce marketplace, web usage, or catalogs.
Select a high-quality export option to preserve clarity and detail.
Using jewelry retouching techniques will help you produce product images that are clear, polished, and have a high conversion rate, which will help your online business stand out.
Final Words
Removing dust and scratches from jewelry or any other product is no longer a hassle. With tons of AI-powered editing tools and outsourced service providers like Visuals Clipping, the entire process has become a smooth experience.
Have fun editing, and don’t be afraid to contact us for any professional photo editing services if you need them! We are the best photo editing company globally.
FAQs
How long does a photo editing company take to remove dust and scratches from images?
It depends on the size of the order; we ensure timely delivery within the time duration of 12-48 hours.
What are some other alternatives to Adobe Photoshop?
Affinity, Capture One Pro, and On1Photo Raw are some of the best alternatives.
Can jewelry retouching service enhance the shine?
Yes, jewelry retouching service can add depth and enhance the shine of ornaments.
How many revisions are allowed with the Visuals Clipping retouching service?
There is no such limit on revisions with the Visuals Clipping retouching service; you can ask for it as many times as you want without any extra cost.