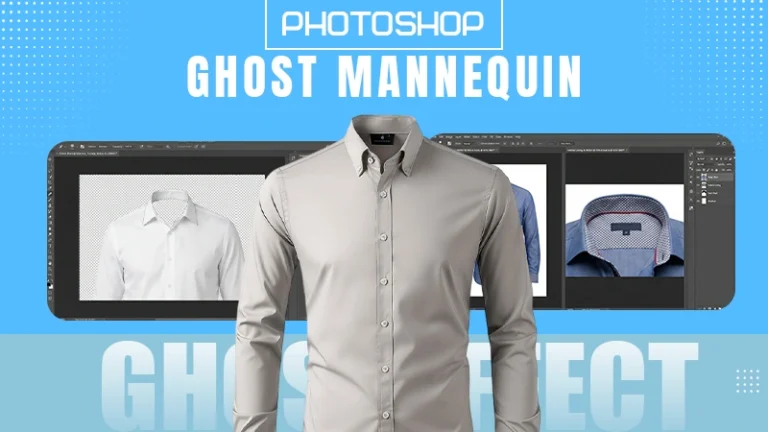
Ghost mannequin effect is one of the most influential photo manipulation effects used in the clothing/apparel & fashion industry, as it provides a high-quality, clean & professional look of clothing.
After the mannequin is removed, the combined images are blended together into one image, which gives the impression that the clothing is on an invisible model. This provides a better representation of how the clothing will fit; therefore, it helps shoppers visualize the product.
The ghost mannequin effect can greatly improve product presentation and improve customers’ understanding of how a garment fits. Whether you are a novice or looking to fine-tune your skills with photo editing
Also Read: Top Photography Trends for 2026
What Is the Ghost Mannequin Effect (And Why It Works So Well)
The ghost mannequin effect (also known as the invisible mannequin) uses realism and clarity to create the illusion that clothing has its own natural shape and dimension, rather than appearing on or around a visible mannequin or model.
Why Use the Ghost Mannequin Effect for Apparel Photography:
- To help produce a more aesthetically appealing and professional product catalog for customer use
- To help highlight the garment’s structure without the distraction of a mannequin or model
- To help improve the customer’s perception of and confidence in a garment
- To reduce reliance on live models for creating marketing materials
How the Ghost Mannequin Effect Actually Works:
- Capturing photos of the same garment from multiple angles
- Eliminating the mannequin from the main image by digitally “stitching” together images taken at different angles
- Adding any necessary inner garment details from previously shot images
Key Elements of a Ghost Mannequin Image:
- Outer garment image (front view) with a mannequin model
- Inner garment image (back side/outside neck) without a mannequin
- Precise placement of both outer and inner garments within the final image
Accuracy and careful attention to detail are vital for the ghost mannequin effect to be successful, as all images are digitally combined in the process.
Also Read: Ghost Mannequin vs Flat Lay
Preparing Images for Ghost Mannequin Photoshop
Before starting any edits, it’s important to make sure everything is prepared properly because having good-quality images will allow the overall editing process to go a lot more easily and be more productive.
Image requirements:
- High-quality images
- Consistent lighting in every single shot
- Same angle and placement for every image
- A neutral or solid background for all images
Essential Shots You Need for a Ghost Mannequin Edit:
- A view of the front using a mannequin
- A view of the back of the garment (optional, based on your needs)
- A view showing the inside of the garment, such as the neck
Steps to take before actually editing:
- Import the images into Adobe Photoshop
- Make adjustments to brightness, contrast, and color balance
- Make sure that all images are the same size and from the same perspective
Pro Tips to Capture Better Source Images:
- Use a tripod to help maintain consistency when taking photographs
- Do not shoot with light sources that may create obstruction or shadows, so that the editing process is more difficult
- Always ensure that the clothing item is free of wrinkles to allow for the best results
If you are properly prepared beforehand for your editing process, you will spend less time editing later on and achieve an overall smoother ghost mannequin look.
How to Create a Realistic Neck Joint in Photoshop
The neck joint is needed in the ghost mannequin effect because the neck joint adds realism to how the garment appears to be actually worn on a body.
The process of creating a neck joint consists of the following steps:
- Open your main image of the body and the inner neck image in Photoshop.
- Using either the Pen Tool or Quick Selection Tool, isolate your garment.
- Remove the mannequin from your main image.
- Cut out the inner neck from your secondary image.
How to Add and Align Inner Garment Details:
- Place your inner neck image below your main garment layer.
- Align the inner neck to the neckline of the main garment.
- Use layer masks to create a smooth blend at the edges.
Key Techniques for a Seamless Neck Joint:
- Slightly feather your edges for more natural-looking transitions.
- Ensure that your color tones match on both layers.
- Use a zoom tool and zoom in to the pixel level for precise alignment of both inner neck and main garment images.
The most common mistakes made when creating a neck joint:
- Misalignment will look fake and unrealistic.
- Harsh edges around the neck join will look unnatural
- Mismatched lighting between the 2 images will make them appear as if they do not go together.
A professional neck joint is what makes a ghost mannequin effect that is of high quality when creating results in Photoshop.
Conclusion
Those working in product photography/eCommerce should master ghost mannequin Photoshop techniques. Good ghost mannequin images come from meticulously developing the images before creating and applying the ghost mannequin techniques used for creating neck joints and professional editing of the images.
Developing products with the ghost mannequin effect not only helps you display your garments, but also helps customers picture the garments on their body, as well as the details of the design of the garment.
With continued practice, patience, and attention to detail, this technique can turn an ordinary product image into a stunning, ready-for-market image according to the current expectations of the industry.
FAQs
What is a ghost mannequin in Photoshop?
Ans: It is a photo editing technique used to remove mannequins from clothing images, creating a hollow, invisible model effect.
Why is the neck joint important?
Ans: The neck joint adds realism by showing the inner part of the garment, making it look naturally worn rather than flat.
Can beginners create the ghost mannequin effect?
Ans: Yes, with practice and basic Photoshop skills, beginners can learn and achieve professional results.
How many images are needed?
Ans: Typically, at least two images are required: one main shot and one inner detail shot.
Is the ghost mannequin effect better than using models?
Ans: It depends on the purpose, but for eCommerce, it offers consistency, cost savings, and a clean presentation.