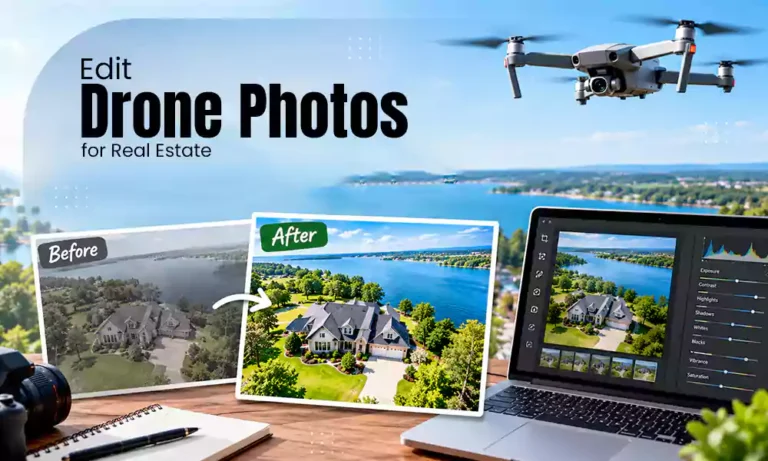
Drone photography has revolutionized real estate marketing. Real estate agents and photographers can now show off gorgeous aerial views instead of ground-level pics, showing the size of the property, the surrounding neighborhood, the facilities available, and the general way of life.
But even the best drone cameras don’t always produce perfectly appropriate images straight out of the lens. The original drone photographs are frequently edited because of lighting conditions, weather, haze, and color restrictions. This is where real estate photo editing services come in.
In this guide, we’ll explain why editing is essential for aerial real estate images and share beginner-friendly tips to help you edit your photos effectively. You’ll learn simple techniques to enhance your drone images and create professional-looking results with confidence.
Also Read: Real Estate Photo Editing Guide: How to Enhance Photos for Property Listings
Why Drone Photo Editing Is Different From Standard Real Estate Editing
Drone images provide a visual story far beyond that of normal photography; they show how a house is situated on its land, how spacious the property actually is, and how close it might be to important amenities like parks, waterfronts, or city centers.
These images affect the perceptions of the buyers – and often the degree of their interest.
Editing aerial photos with the right kind of editing can produce sharp, bright, and emotionally powerful photos that attract more buyers, make the listings more appealing, and help properties sell faster.
Editing is important since professional real estate photography can lead to an increase in price per square foot of 47% and thus helps to raise selling prices. Moreover, high-quality images receive 118% more online views.
It is important to edit photos of properties if you want potential buyers to take notice of the images in your listing and sell your property for a higher price.
Also Read: Virtual Staging vs Physical Staging
Common Problems With Raw Real Estate Drone Photos
Even those who are just starting out can improve their drone photography by using a few simple editing techniques. Nevertheless, aerial images do present their own set of challenges:
- Bright skies can wash out images
- Harsh contrast can create dark shadows
- Haze can reduce detail and clarity
- Colors sometimes look dull or too cool
- Skies may appear flat or gray
Even a beautiful aerial shot without any editing, can look stale or unbalanced. Editing drone real estate photographs helps:
- Bring back details lost in shadows and highlights
- Add clarity and depth
- Enhance contrast and vibrancy
- Correct crooked horizons and distortion
- Create consistency across the listing photo set
Editing enables drone shots to go beyond simple documentation and become powerful marketing images, having a genuine effect on buyer engagement.
Lens distortion at wide angles
Crooked horizons are a common mistake that beginners make in drone photography. Even a tiny tilt can make an image look unprofessional.
Use the Crop & Straighten Tool. Line up the horizon with the grid to make sure your image is balanced. Also check that buildings and other vertical structures appear straight.
Overexposed skies / underexposed ground
Drone cameras often have trouble capturing scenes in daylight. The sky appears washed out, shadows become too dark. To fix this, try these adjustments:
- Increase exposure if the image looks too dark. This helps bring up the brightness.
- Lower the highlights to recover details in the sky. This prevents the sky from becoming a blur.
- Raise the shadows to bring out details in darker areas like under trees or in building corners.
- Add contrast to make the image feel more dynamic and give it a sense of depth.
A balanced exposure lets viewers clearly see both the property and the surrounding landscape.
Inconsistent color across multiple shots
Color has an emotional impact on buyers. The goal is natural enhancement—not artificial saturation. Adjust:
- Increase vibrance to enrich tones.
- Add saturation sparingly for intensity.
- Adjust temperature to warm up dull images.
- Additionally, focus on making:
- Make the grass look natural and healthy.
- Make water and sky appear rich and appealing.
- Make homes stay true-to-life in tone.
Real estate photos must look cohesive across the full set—clean, elegant, and immersive. Professional editing provides that consistency.
How to Retouch Drone Real Estate Photos for Consistent Results
The real estate photos that get put together consistently require consistent editing of all photos so that all images of a property have one look, sophisticated and elegant.
There may be distracting objects like cars, adjacent houses, poles in front of the property that draw the eye away from the home itself. These objects can be removed or made less prominent during retouching.
Objects commonly removed include:
- Trash cans
- Blocking cars
- Construction equipment
- Street clutter
- Utility equipment
Depending on the software used, the tools necessary to edit such objects include Clone Stamp and Healing Brush to Content-Aware Fill. These tools could be used in combination with each other to edit out unwanted objects.
Step-by-Step Guide to Retouch Drone Photos of Property for Real Estate
1. Cull and Import the Best Shots
- Prefer RAW files.
- Ignore fuzzy, poorly framed or under-exposed pictures.
2. Balance Exposure & Dynamic Range
- Recover blown highlights in the sky.
- Illuminate shadows within the premises.
- Maintain a natural equilibrium in the home and surrounding property.
3. Correct White Balance and Color
- Eliminate blue/cyan haze from aerial photographs.
- Realistically render grass, roof, concrete and water.
- Avoid excessive saturation.
4. Correct Lens Distortion and Perspective
- If a lens profile is available, use the drone’s lens profile setting.
- Straighten the horizon.
- Avoid poor convergence of buildings, maintaining a believable aerial perspective.
5. Enhance Clarity and Cut Through Haze
- Apply moderate Dehaze/Clarity.
- Be careful not to over do it, heavy dehaze can make the image look man made.
6. Retouch Temporary Distractions
- When applicable, eliminate temporary distractions like trash bins, debris, stray objects or unwanted vehicles.
- Apply Clone/Heal or Object Removal features in Photoshop.
- Avoid removing features which could impact a potential buyer’s perception of the property.
7. Replace or Enhance the Sky (If Necessary)
- Select a believable sky that has the same lighting direction and time of day.
- Mask rooflines, trees, antennas and other edges carefully.
- Don’t use dramatic skies that are obviously not consistent with the property lighting.
8. Apply Final Sharpening and Noise Reduction
- Apply moderate sharpening.
- Minimize noise while preserving natural features like roof detailing and greenery.
9. Perform a 100% Zoom Quality Check
- Zoom to 100%.
- For roofs/trees, look for a halo, unnatural colors, bad masking, crooked horizons or cloning.
- Check the edited image against the original to make sure that the property has not been manipulated in ways that are untrustworthy.
10. Export for MLS and Print Marketing
- Save a high-quality master file.
- Export a JPEG that is web/MLS friendly, in the correct size and color space.
- Save the original RAW file and the file that can be edited.
Editing by Shot Type: Bird’s-Eye, Angled, and Twilight
Each drone angle requires a different editing approach.
Straight-Down (bird’s-eye) Property Shots
Straight‑down images give a top‑level view of the property. Are useful for showing the overall layout. These shots can highlight the roof, the swimming pool, the lawn, the driveway, the outdoor areas, and the property boundaries.
When editing bird’s‑eye images, pay attention to geometry, color consistency, and landscape details. Make sure lines and shapes appear natural and avoid adjustments that could make the property layout look distorted.
Angled Establishing Shots
Aerial photos taken from an angle usually show the property, the land, the sky, and the nearby area in one picture. These kinds of pictures can be especially useful as the aerial shot in a real estate listing.
For these kinds of photos, balance the light between the sky and the ground, make sure the horizon is straight, and make the property and the surrounding area stand out. Adjustments to the sky and colors should be gentle so the whole scene feels real and matches up well.
Twilight Aerial Shots
Twilight aerial photography brings out a dramatic and atmospheric look of a property. When editing, the aim is to bring out the warm evening feel without making the picture look fake.
Adjust the exposure, white balance, highlights, shadows, and sky with care. If the property has lights, ensure those lights look naturally part of the scene. A good twilight edit should feel warm and welcoming while still showing the property accurately.
How Many Aerial Shots Should You Include in a Listing?
- Standard residential: 3–5 aerials (overview, front approach, rear garden/pool, neighbourhood context)
- Luxury property: 5–8 aerials including detail shots of grounds, pool, and views
- Commercial property: 8–12 aerials showing access, parking, neighbouring amenities, building from multiple angles
- Aerial video: A growing trend for luxury listings, particularly if location, scale or setting is a major consideration.
The amount varies based on the property’s size, type, and distinguishing characteristics. Select shots that illuminate different perspectives, do not shoot the same shot from slightly different angles
DIY Drone Editing vs. Professional Editing
Real estate photographers have two choices when it comes to editing their drone photos. They can do the editing themselves. They can hire a professional editing service. The best choice usually depends on how much work they have, how much money they have available, how good they are at editing, and how quickly they need the photos done. Editing the photos on their own allows photographers to have control over the end result. This can be an option when they are working with just a few photos. It also helps them get better at editing and develop their special style.
High-quality editing takes time to learn. When there are a lot of photos to edit, it can take a long time. Making sure all the photos look the same across a listing can be hard. Professional editing can save time for photographers who work on properties or have a lot of photos to edit. Skilled editors can handle things like fixing the lighting, adjusting colors, fixing the angles, changing the sky, and removing objects. They can do all of this while keeping everything looking the same across the set.
The main benefit is that photographers can spend time taking pictures of properties, talking to clients, and running their business instead of spending hours editing photos.
For projects that happen once in a while, doing the editing themselves can make sense. For photographers who have a lot of real estate work, professional editing can make the whole process faster and more consistent.
When to Outsource Drone Photo Editing to Visuals Clipping
For professionals who handle multiple properties every week, capture dozens of aerial photos for each listing and are pressed for time to submit properties to MLS, it makes the most sense to outsource the drone photo editing process to a professional service.
Visuals Clipping has been handling real estate photo editing for over years, including aerial and drone image editing for residential, luxury, and commercial listings. For drone photography, our editors have the expertise to balance the brightness of the sky with the brightness of the ground and property, adjust the light direction of the replacement sky, and eliminate distracting items completely and without leaving behind any artefacts.
Also Read: Best Real Estate Photo Editing Services in the US
Final Thoughts
Editing makes drone photos polished; lighting, colors, clarity, and distractions can be improved so that the final image remains realistic. The purpose of editing is to enhance, not to misrepresent the image.
Whether you edit in-house or outsource to a professional service, the standard to aim for is the same: accurate, consistent, and visually strong images that make a buyer want to see the property in person.
Also Read: Top Photography Trends for 2026
Frequently Asked Questions (FAQs)
Q1. Does drone photo editing include sky replacement?
Ans: Yes, sky replacement can be part of drone photo editing. If the original sky is dull, gray, or overexposed, editors can enhance it. Replace it with a more suitable sky. The replacement should match the lighting, color, and perspective so the final image looks natural. Photoshop, for example, includes a Sky Replacement tool for this purpose.
Q2. How do I remove haze from aerial real estate photos?
Ans: Haze can be reduced by using a Dehaze adjustment in photo-editing software such as Adobe Lightroom. Start with an adjustment and increase it gradually until distant buildings, landscaping, and other details become clearer. Avoid overusing Dehaze because it can make colors and contrast look unnatural.
Q3. What software is best for editing drone real estate photos?
Ans: Adobe Lightroom is an option for exposure, color correction, haze reduction, sharpening, and batch editing. Adobe Photoshop is better for advanced work such as detailed object removal, perspective corrections, and sky replacement. Lightroom also provides masking tools that allow you to make adjustments to the sky, landscape, and other areas of an aerial image. For beginners, Lightroom can be a starting point, while photographers who need more advanced retouching can combine Lightroom with Photoshop.
Q4. How much does aerial/drone photo editing cost?
Ans: The cost depends on the type and complexity of editing. Basic exposure, color correction, and straightening can cost less than services such as HDR blending, detailed object removal, or sky replacement. For a fair price, photographers should compare editors, per-image rate, turnaround time, included revisions, and the level of retouching required.