Many photographers want to try something challenging. And that is how they get introduced to the niche of macro photography! It can seem a bit difficult at first, but if you have the right techniques and suitable equipment at your disposal, nothing can stop you from becoming a pro. In this article, we have provided what constitutes this style of photography, why we need it, its essentials, how to do it better, and more. Thus, for all the information, continue to read till the end.
What is Macro Photography?
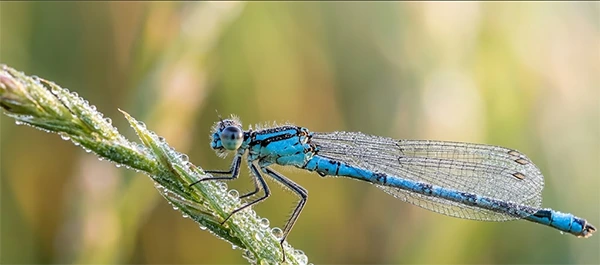
Many people have this common question: “What is macro photography?” If you, too, are concerned about the same issue, here is the definition. In simple terms, it is a technique of photography in which photos are taken at high or mostly 1:1 magnification. The practitioners often use specialized lenses for this purpose.
Macro photography lets people take extremely close-up shots of small objects in the world. The subject of the photograph might be tiny, but this style of photography highlights all its details prominently, making it appear bigger than its real-life size.
Did you know? Most macro photographers use professional photo editing services as part of the post-production process. That makes the subjects of the photographs look even more detailed and lifelike.
Why Do We Need Macro Photography?
The major advantages or benefits of macro photography are listed here. These include the ability to explore the world better, leveraging the high accessibility of subjects, and others as mentioned below.
- To better explore the world around: With the help of the techniques used in macro photography, we can easily explore the fascinating aspects of the micro world around us. We can even see an ant in extreme detail, like zooming all the way down without compromising on the pixel quality.
- To take advantage of high subject accessibility: When we talk about macro photography, there is no lack of subjects. You can find a million things or creatures easily around you that you can make part of your photography session.
- That increases our power of observation: When you look at a tiny creature or a tiny object, you just cannot see how this is in actuality. That is because your eyes are only wired to observe details up to a certain extent. Thus, macro photography is like a tool that enhances your visual senses. You can see things in detail that are impossible with the naked eye.
- To take up a challenging photography niche: As photographers who do this for passion, challenging niches like macro photography are important. That helps keep the work engaging and fun on the professional front.
- To unleash creativity with unique aspects of nature: Have you ever seen a bed of grass with dew drops sitting on top like diamonds in the early morning hours? Well, it is an example of the moment when macro photography allows you to be creative with nature.
Also learn: Most professionals use photo retouching services or techniques in post-production to make their images look more prominent and detailed.
Essential Macro Photography Gear You Need
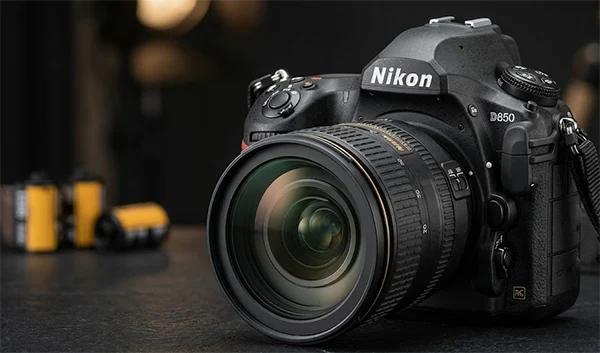
The most important equipment is a macro photography lens. Learn more about the essentials you need for this niche. As a beginner, a person merely needs a camera and a close-focusing accessory.
That is how minimalistic gear works for a budding macro photographer. A detailed overview is provided below.
The Camera for Macro Photography
If you have nothing but a quality camera, you have got 90% of everything for macro photography. The most important thing is to make sure that you buy a camera that offers interchangeable lenses for the best experience. And, when you grow in experience, you can even upgrade your equipment easily.
👉 Product options: For you, any DSLR or mirrorless camera model will work from brands such as Canon, Nikon, Sony, Fujifilm, Panasonic, Olympus, Pentax, etc.
Did you know? You can even use your smartphone camera to explore the micro world with macro photography. The only condition is that you have the right accessory.
The Close-Focusing Accessory for Macro Photography
Most cameras aren’t fit for macro photography just because they cannot close up sufficiently. Thus, to fix that, a magnifier is needed. Thus, suitable options are close-up filters, extension tubes, reversing rings, and a dedicated macro lens.
| Macro Lens Photography Close-Focusing Accessory | |
| Close-up fillers |
|
| Extension tubes |
|
| Reversing rings |
|
| A dedicated macro lens |
|
Did you know? Professional photographers don’t have to take the final shot right from the click of their camera. Instead, a masterpiece macro photograph requires retouching after production using several photo editing techniques, such as background removal, color correction, automotive photo editing, etc.
Optional Macro Photography Equipment You Might Consider
To further enrich your macro photography experience, you can also consider the following items or gear. It includes a tripod, a macro focusing rail, and a macro flash.
- A tripod: This will help you keep your setup stable without compromising the quality of your final pics. For a deep depth of field, working with an ultra-narrow aperture is inevitable. The most common complication here is that it results in a longer shutter speed. A tripod helps here by preventing blur from the camera due to shaking while photographing.
- A macro focusing rail: If you are the one who has to waste a lot of time adjusting the tripod position and tripod head angle, this is the solution. Now you can easily nail your focus. This tool mounts between your tripod and the camera for optimal positioning, max focus, and ultra-fine pictures.
- A macro flash: For extra light on your subject, you can always use a macro flash. And you will never experience a lack of proper lighting. For the best experience, you can consider a ring flash.
These tools might not seem essential for absolute beginners, but they are crucial if you want professional outputs in macro shot photography.
Also read: Product Listing Optimization: Designing Product Images That Get Attention
Macro Photography Settings for Stunning Pictures
For ultra-focused and fine results in macro photography, make sure to pay attention to the following settings. These configurations often have considerably to do with aperture priority and manual mode.
Choose Either Aperture Priority or Manual Mode
For high-quality outputs, either set your camera to Aperture Priority or Manual mode. The former enables the photographer to choose the aperture and ISO settings. This is allowed while your camera chooses the shutter speed.
Next, the manual mode lets you choose the aperture, the shutter speed, and the ISO. That is more than what you can do by setting your camera to the former mode.
Key insight: Preferably, most photographers take their shots in manual mode as it offers the maximum flexibility and creative control.
Aperture for Perfect Depth of Field
If you are new to the field of photography as well, the aperture is a cavity inside your lens. It opens and closes depending on how you have set your aperture settings. Not just a key part of exposure, it also determines the depth of field.
Consider the following settings concerning this part.
- Choose a small aperture when most of the subject of your photography is in focus.
- When you select a large aperture, your images will only cover very little of your subject.
- To help you have an idea, f/16 is a setting for a small aperture, while f/2.8 is for a large aperture.
- If you want to keep your entire subject sharp from front to back, then you will have to shoot at f/13 or f/16.
Here, if you want to find what works best, you will have to keep experimenting with these settings.
Manual Focusing for the Sharpest Results
Now, let’s deal with the basics of manual settings. This mode must be used for capturing birds in flight, airplanes taking off, and vehicles speeding past at very high speeds. When it comes to autofocusing on your subjects at macro magnifications, that is where manual focusing works best!
How to enable manual mode: It might seem overwhelming at first. But it is very simple. You just need to switch your lens from autofocus to manual focus. You will find this switch on the side.
Tips for Macro Photography Beginners
As a beginner, even if you are a pro, consider the following table explaining various techniques on how to do macro photography better. It touches upon lighting, depth of field, magnification, working distance, and other aspects.
| Key Areas to Learn | Quick Tips |
| Mastering Lighting in Macro Photography |
|
| Understanding & Controlling Depth of Field |
|
| Understanding Magnification and Working Distance |
|
| Focus Techniques for Crystal-Clear Images |
|
| Composition Techniques for Captivating Images |
|
| Post-Processing Techniques |
|
Also read: Top Wedding Photo Editing Services For Wedding Photographers in 2026
Final Words on Macro Photography
Macro photography is a challenging niche, but it is worth learning. That is because it helps enhance our ordinary perception of the tiny, unseen world around us. Mastering it just requires learning about the nitty-gritty of lighting, understanding and controlling depth of field, and all the other aspects as mentioned in the article. And, with enough time and dedication, you will also become perfect at taking master shots for maximum clarity and fine details.
FAQs
Q1. What is macro in photography?
Ans: It is the art of taking extreme close-up photos of small subjects. This type of photography makes the objects appear larger than what they really are in the actual world.
Q2. Who are some famous macro photographers?
Ans: Thomas Shahan, Levon Biss, Don Komarechka, Alexey Kljatov, and Mike Moats are the major and famous macro photographers.
Q3. What do I need for macro photography?
Ans: To kick-start your passion as a macro photographer, you just need nothing more than a quality camera and focusing gear. If you can afford to spend some money, any DSLR camera will do best here.
Q4. What is macro and micro photography?
Ans: Macro photography is performed on small objects that are visible to the naked eye, but not all the details can be seen. However, micro photography is performed on objects that are even beyond the reach of the normal naked human eye. For microphotography, microscopic accessories are utilized.
Sources:
- Digital photography: How to Create Breathtaking Macro Photos: The Complete Guide
- Alan ranger photography: Unlocking the Art of MACRO PHOTOGRAPHY: Techniques and Tips
- Nature photography network: The Changing Face of Macro Photography