Capturing beautiful portraits takes more than just pointing your camera at someone; it’s also about telling a story, capturing emotion, and controlling the technical aspects of the photo.
A fantastic portrait captures the personality of the person that is being photographed and is created through light, composition, and a sense of depth in order to produce a beautiful image.
If you are just starting or trying to become better at photography, if you learn just a few techniques it will quickly elevate your photographs and create more professional-looking images.
Essential Gear & Camera Settings for Portrait Photography
Great portraits can be captured with any type of equipment; however, it’s important that you have an understanding of how to properly use your equipment. The first element that you should consider when photographing a subject is the choice of lens.
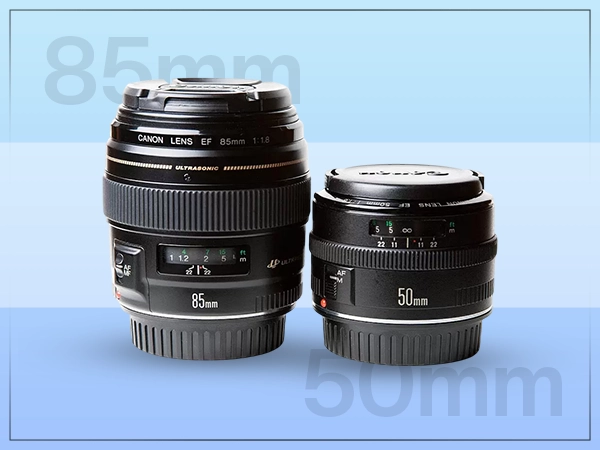
Ideally, your focal length should be between 50mm and 85mm, as this range typically provides a realistic portrayal of facial proportions without distortion. When taking photographs with a cell phone, switch your setting to portrait mode, or, if your cell phone is equipped with a telephoto lens.
Use this setting instead of the wide-angle setting. Camera settings will significantly influence the final outcome of your photographs:
- Use a wide aperture (f/1.8 to f/4) to achieve a soft and blurry background
- Use the lowest ISO possible (100 – 400) to minimize noise
- Adjust your shutter speed so you don’t have any blur (typically at least 1/125 second for handheld shots)
- Always focus on the eyes, as they are the most expressive part of the portrait
If you are just starting out, use Aperture Priority Mode. Once you have gained experience, you can switch to manual mode to have complete creative control.
Also Read: Mirror Vs Camera
Lighting Guide: Natural Light, Golden Hour, and Basic Studio Setups
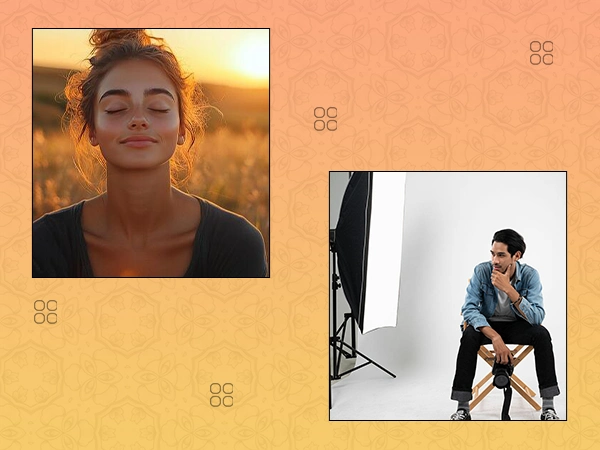
When it comes to portrait photography, the most important thing is lighting. Having quality light will cause your still images to appear clearer than those taken without quality light.
Direct Sunlight can be harsh. If you want to create quality portrait photographs, then the best way is using indirect sunlight, e.g., shooting next to a window/door in a room or outside in overcast weather.
Soft light creates less shadow, can be very flattering to the subject’s complexion, and gives the subject’s skin a more uniform/truer look.
Golden Hour is the best time to take People’s Photos because:
- The Quality of the Light is warm, and the light source is larger, so there are fewer harsh shadows; thus, the shadows cast are natural looking.
- The Shadow Lengths will be much longer, giving a naturalistic feeling to the Photograph.
- Skin Tones will have a more realistic look to them than they would have if taken without using Golden Hours.
Do NOT shoot during the middle of the day because the Sun will create VERY harsh shadows below the eyes and nose.
Also Read: Jewelry Product Photography Mistakes & How to Fix Them
For Indoor/Studio-type Set-up Photographs:
- Use ONE SOFT Light Source positioned at a 45 Degree Angle to the subject.
- Use a Reflector to bounce light back onto the subject to create a more uniform appearance and to eliminate shadows created by the Lighting Source used.
- Use only Light sources located to the Front of the subject, NOT directly above or below them.
Posing, Angles, and Composition
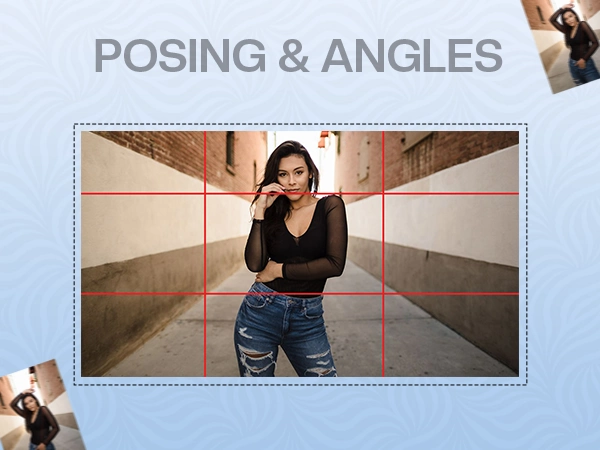
The pose of your subject plays a valuable part in determining the success of the portrait. Many individuals feel uncomfortable in front of the camera. Therefore, it is your responsibility to assist the subject in getting into a pleasing pose.
You may start with minor adjustments:
- Ask the subject to turn their body slightly (approximately 45°) rather than directly facing you.
- Ask them to keep their chin slightly lowered or in front of them to achieve a sharper jawline.
- Encourage them to relax their shoulders and show them how to display a natural expression.
In relation to posing, angles can also have a significant influence on the overall appearance of the portrait:
- Photograph from the subject’s eye level to create a more natural appearance.
- To achieve a more flattering pose, photograph from slightly above the subject’s eye level.
- Avoid photographing from below to avoid distorting the features of the subject’s face.
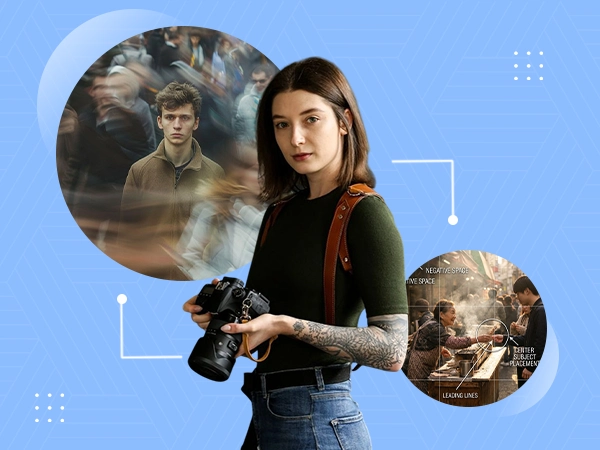
Here are some composition techniques to improve your photographs:
- Use the rule of thirds to place the subject at the intersection points.
- Leave adequate negative space to make the overall photograph appear to have less clutter.
- Use a simple background that is not distracting.
Also Read: How to Pose for Portrait Pictures
Mastering Background, Focus & Depth in Portrait Photography
When capturing a fantastic portrait, you’ve got to consider the image you’re presenting for your subject as well as what surrounds them.
Backgrounds should support the subject without overwhelming them. The best backgrounds are plain walls, natural environments, and softly out-of-focus areas.
Do not use a background that has too much clutter or is too busy because it will take their attention away from the face.
To create depth:
- Increase the distance between the background and the subject
- Use a wide open aperture to blur out (soften) anything in the background
- Add some kind of visual element such as framing or foreground elements that help with layering
- The focus of your photograph is absolutely critical.
- Make certain that both eyes are sharp and in focus.
- Use single-point AF when possible.
- Always check your focus when shooting with wide open apertures.
If you want to be creative, try different techniques:
- Backlighting because it will give your subject a nice soft halo effect or create a silhouette
- Use objects in the surrounding area as framing devices
- Use high-contrast light versus shadow against your subject for dramatic effect.
Also Read: Best Backgrounds for Headshot
The Secret Step: Professional Portrait Retouching
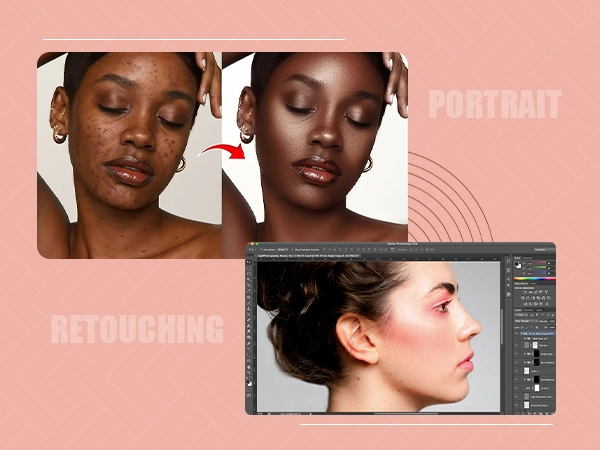
When taken under ideal conditions of lighting, lens and pose, photos taken straight from the camera will rarely have the same level of polish as an image that is of magazine quality. It is in post production that the real transformation of a good photo into an excellent photo happens, through subtle adjustments.
Personal distractions take away from the focus of the subject, including:
- Fly-away or unruly hair and misaligned edges
- Temporary skin issues or blemishes
- Inconsistent skin tone and lighting
- Distracting or cluttered background
Professional retouching is intended to enhance a photograph, not to over edit. Retouching techniques such as frequency separation allow the retoucher to very carefully smooth the skin while maintaining the skin’s inherent texture.
Color correction is done with exactness to ensure that the skin tone appears balanced, realistic, and lifelike. Professional retouching gives a portrait its authenticity while also adding a clean, classy, and professional quality.
Also Read: What is Photo Retouching?
Conclusion
Photographing beautiful portraits is a blend of technical expertise and artistic vision. If you successfully manage your camera settings, utilize appropriate lighting, and provide confident leadership to your subject.
You can significantly enhance the quality of your outcomes as a photographer. Small changes in angle, positioning or background will also affect your final image.
If you constantly practice with a focus on the end result, you will learn to produce portraits that not only have an attractive appearance but will also convey emotional messages through them.
Frequently Asked Questions (FAQs)
Q1. What is the best lens for portrait photography?
Ans: A 50mm or 85mm lens is ideal for portraits because it provides natural perspective and flattering results.
Q2. What is the best lighting for portraits?
Ans: Soft natural light, especially during golden hour or near a window, is the most flattering and easy to use.
Q3. How do I make my portraits look professional?
Ans: Focus on lighting, use a wide aperture for background blur, and guide your subject’s pose and expression.
Q4. Can I take good portraits with a phone?
Ans: Yes, modern smartphones can capture great portraits if you use good lighting and proper composition.